vRealize Automation 8.x - Setup Azure Cloud Account
vRealize Automation 8.x can integrate with several cloud providers, and to do this for your Microsoft Azure environment, select Cloud Assembly > Infrastructure > Connections > Cloud Accounts and create each of the cloud integrations you require. For Azure, there is some preparation we need to do on the Azure Portal, so head over to portal.azure.com and authenticate with the account which has access to the Subscription you want to integrate with.
To integrate vRA 8.x with Azure, there are 4 main configuration IDs and some permissions need to be set which we need to complete and provide to the vRA portal. These are covered in the sections listed below.
- Subscription ID
- Tenant ID
- Client Application ID
- Client Application Secret Key
- App Registration Permissions
- Register Compute Provider to Subscription
- vRA Portal Configuration
Subscription ID
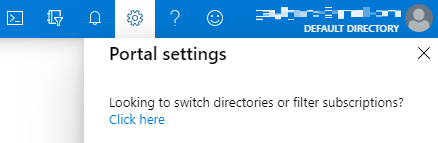
To locate the subscription ID, log into the Azure Portal and ensure you have selected the correct Directory. If you have multiple directories, you can select the correct one from the menu option below.
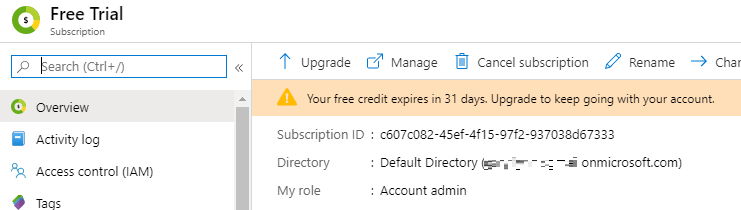
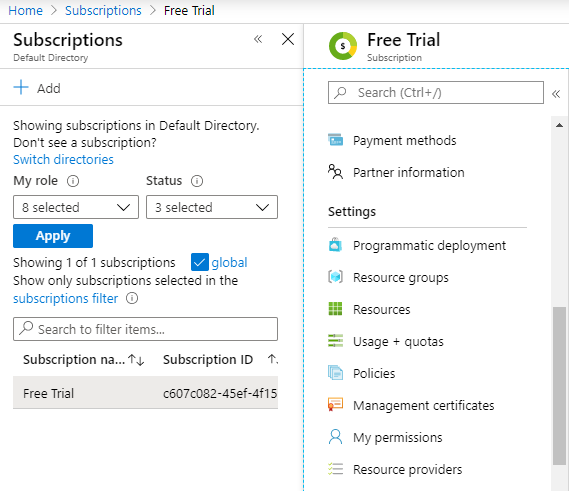
Navigate to Subscriptions where you will see all subscriptions in this directory. Select the subscription you want to integrate with vRA and copy the Subscription ID to a notepad.
Tenant ID
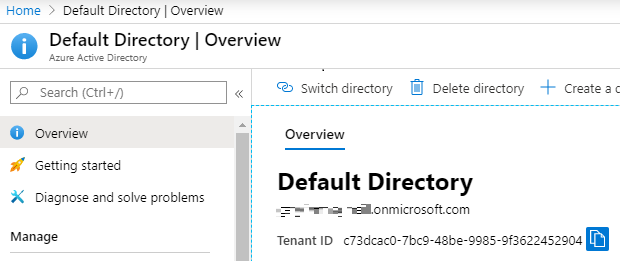
To locate the tenant ID, log into the Azure Portal and ensure you are still logged in with the correct directory. From the Azure Portal homepage, search for or select Azure Active Directory. This will load the directory you are currently in and from the overview page we can grab the Tenant ID. Copy this to a notepad along with the previous Subscription ID.
Subscription ID: c607c082-45ef-4f15-97f2-937038d67333
Tenant ID: c73dcac0-7bc9-48be-9985-9f3622452904
Client Application ID
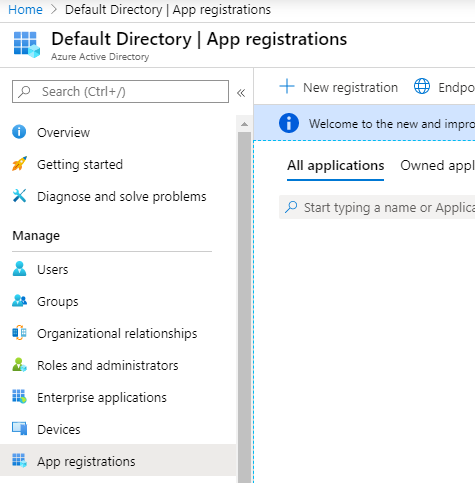
From with the Azure Active Directory interface, under the Manage menu, select App registrations > New registration.
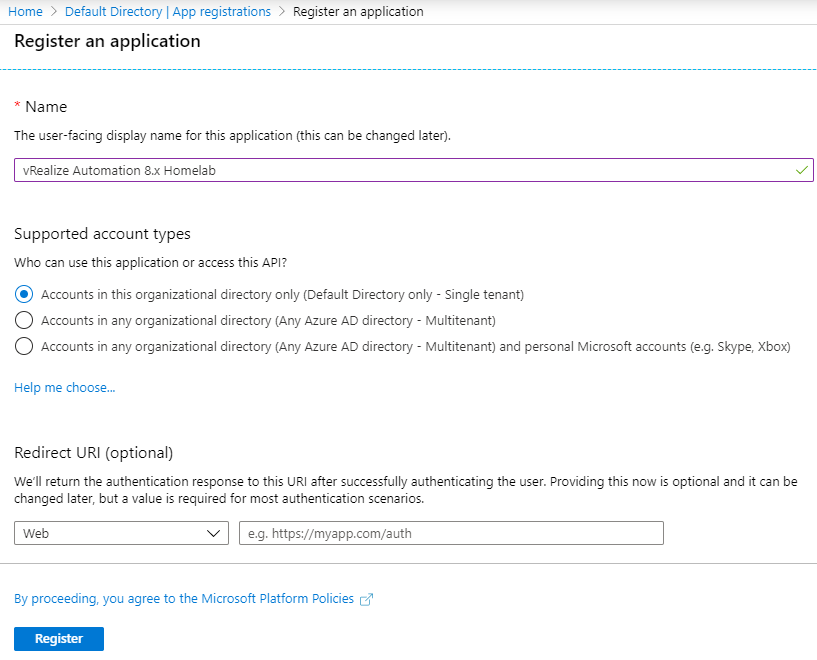
Enter a logical name for the application registration, such as "vRealize Automation 8.x Homelab". For the supported account types, select the option applicable to your environment. For a single directory, the first option will be sufficient, however if your environment has multiple organizational directories, select the second option so that the single app registration can be used across all directories. The redirect URL should be left blank.
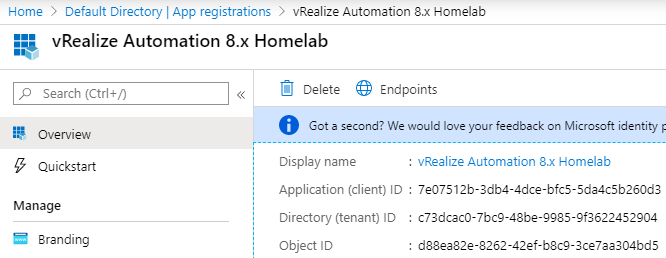
Once the app is registered, copy the Application (client) ID to your notepad. The Directory (tenant) ID should be the same as we previously retrieved.
Subscription ID: c607c082-45ef-4f15-97f2-937038d67333
Tenant ID: c73dcac0-7bc9-48be-9985-9f3622452904
Client Application ID: 7e07512b-3db4-4dce-bfc5-5da4c5b260d3
Client Application Secret Key
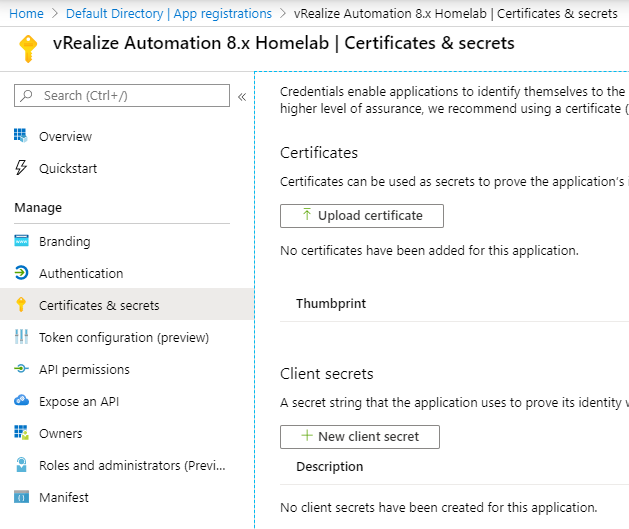
The Client Application Secret Key is the "password" used by the client application to authenticate to Azure. Think of the Client Application ID as the username and the Client Application Secret Key as the password. To generate the secret key, select your app registration (vRealize Automation 8.x Homelab) and under Manage, select Certificates and Secrets > New client secret.
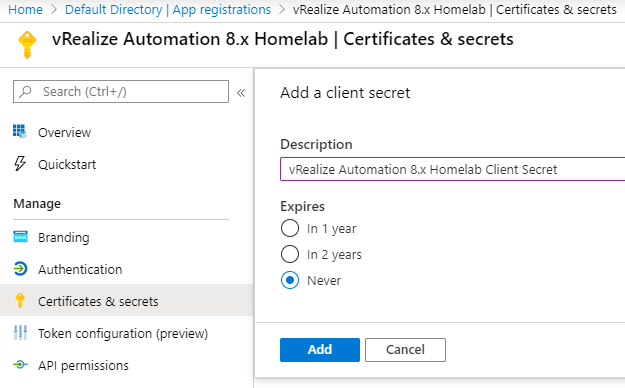
Enter a description for the client secret, such as "vRealize Automation 8.x Homelab Client Secret" and set the expiry per your security policy, followed by Add.
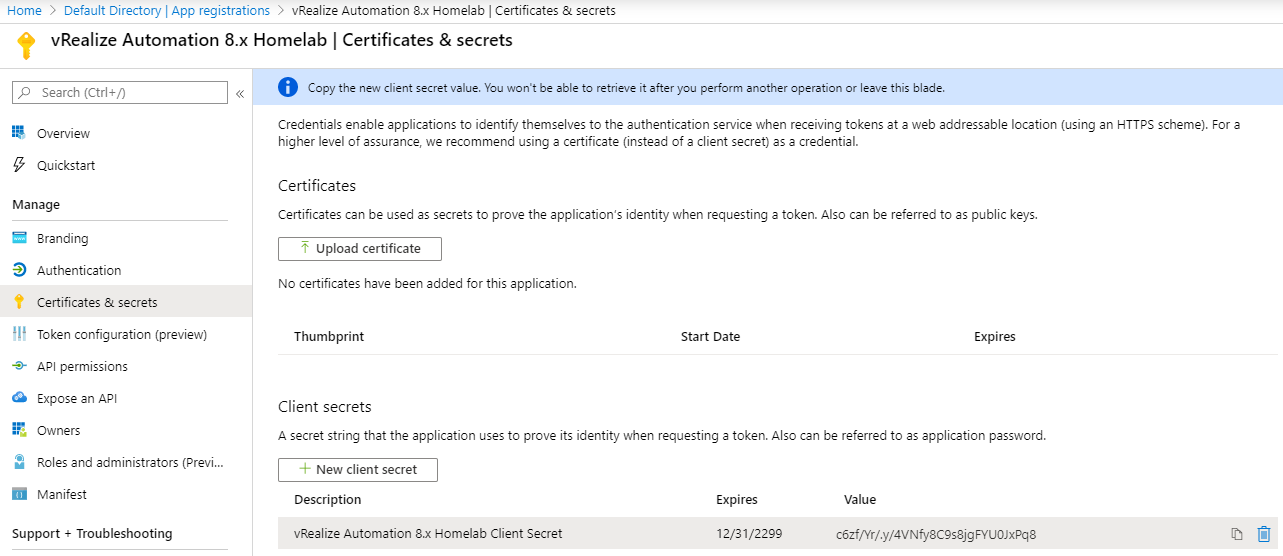
Once this is created, copy the Value from the client secret to your notepad. Be very careful, once you perform another operation, or navigate away from this page, the secret key can never be retrieved again. Ensure you have it recorded somewhere safe and backed up!
Subscription ID: c607c082-45ef-4f15-97f2-937038d67333
Tenant ID: c73dcac0-7bc9-48be-9985-9f3622452904
Client Application ID: 7e07512b-3db4-4dce-bfc5-5da4c5b260d3
Client Application Secret Key: c6zf/Yr/.y/4VNfy8C9s8jgFYU0JxPq8
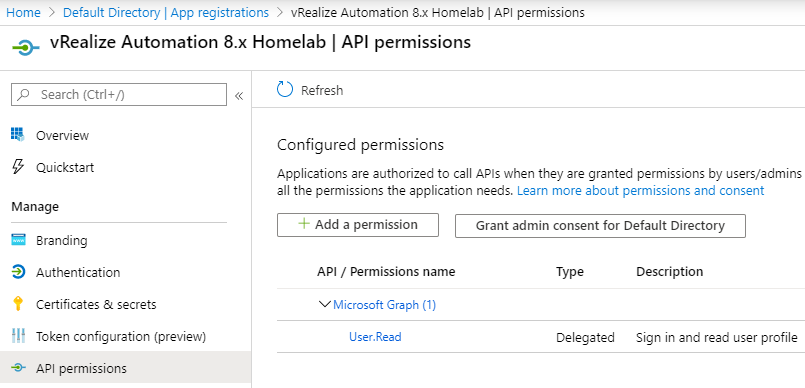
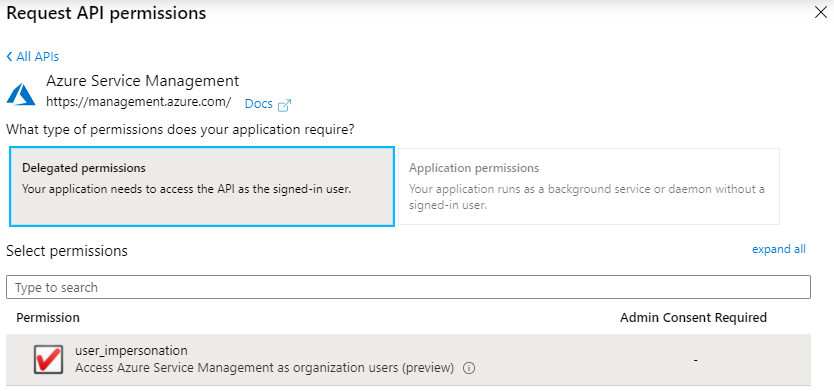
From the menu on the left, select API permissions, Add a permission.
From the Select an API screen, select Azure Service Management under Commonly used Microsoft APIs.
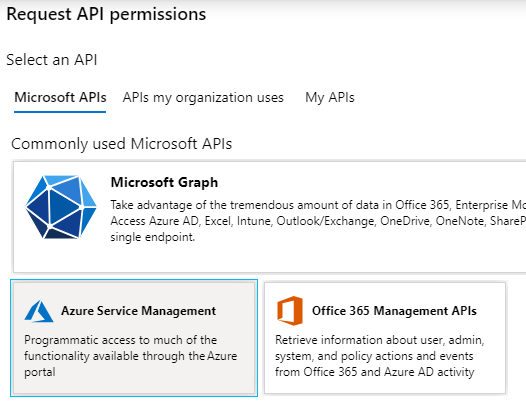
Select Delegated permissions and tick user_impersonation, followed by Add permissions.
App Registration Permissions
Now that we have an account to connect to Azure, the next step is to give it the required permissions to the subscription. Navigate back to Subscriptions, select the subscription you are adding to vRA and on the menu, select Access control (IAM).
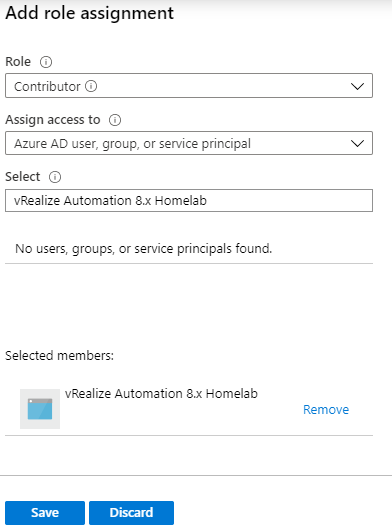
Select Add, Add Role Assignment and select the Role as Contributor. This will give the app registration access to create and manage all resources, except access to resources. For Assign access to, leave this as the default "Azure AD user, group, or service principal". In the select field, search for the name of your app registration (vRealize Automation 8.x Homelab) and select the correct object. Once selected, ensure the object exists under Selected members and click Save.
Register Compute Provider to Subscription
The final step to complete in Azure is to navigate to your Subscription in the Azure portal, and on the menu, scroll down and select Settings, Resource providers.
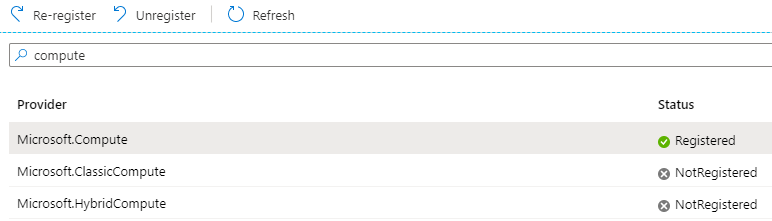
In the Filter by name... search box, enter Compute and Register the Microsoft.Compute resource provider.
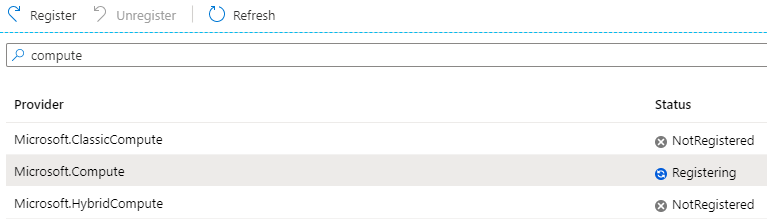
The registration will take a few minutes but will eventually show as Registered. You can refresh the status with the Refresh button.
vRA Portal Configuration
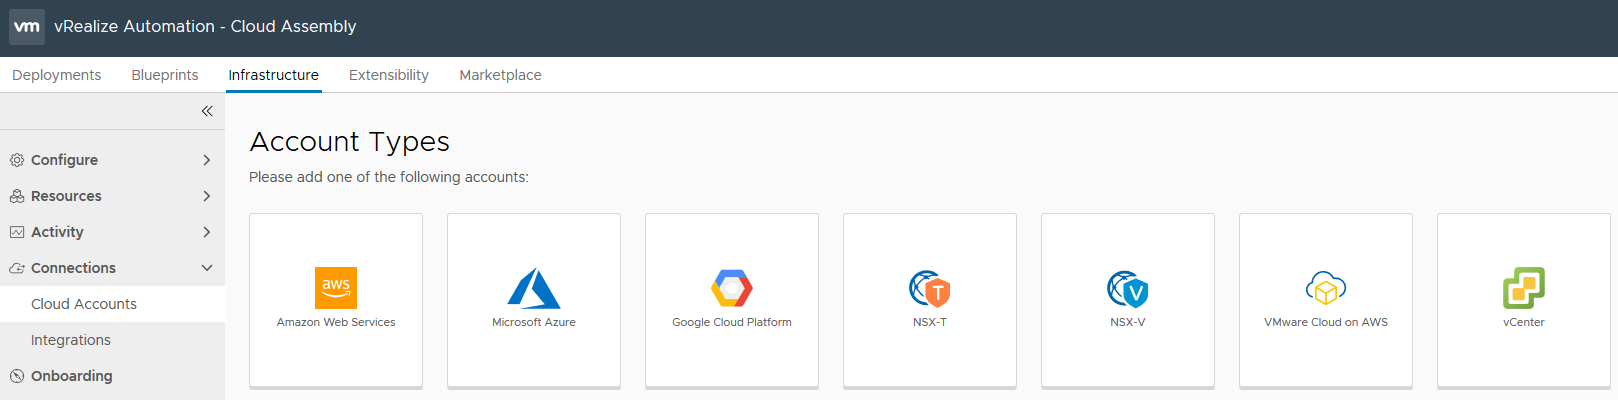
Back in the vRA portal, select Cloud Assembly > Infrastructure > Connections > Cloud Accounts > Add Cloud Account > Microsoft Azure.
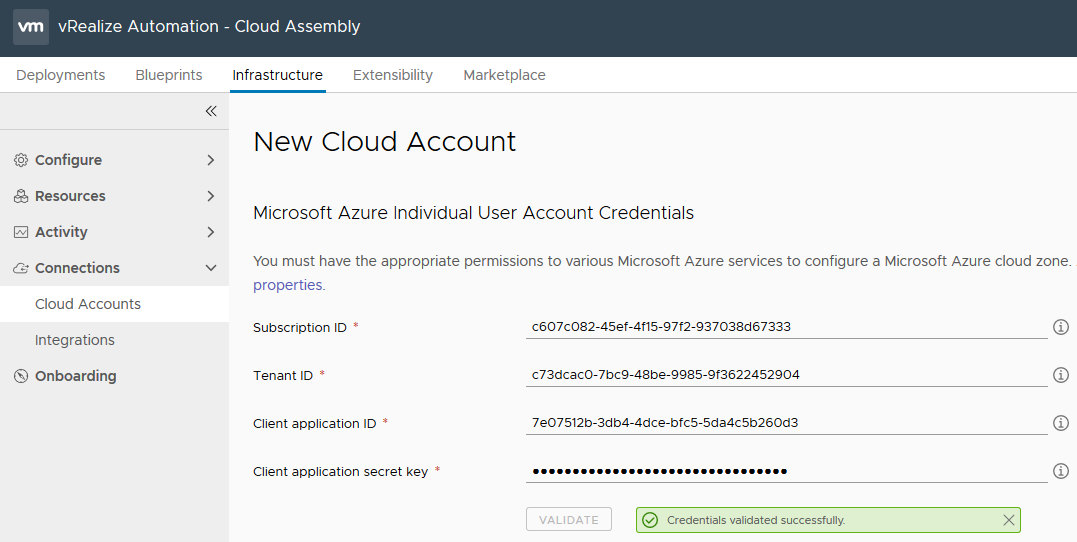
In the New Cloud Account page, copy in the four values we obtained from the Azure Portal earlier, and select Validate to confirm the credentials are correct.
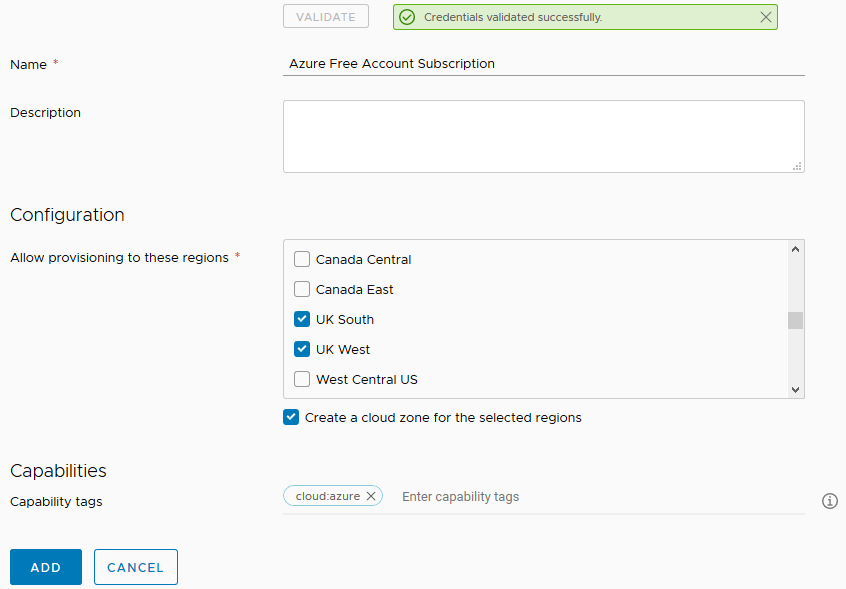
Enter a name for the Cloud Account and optionally a description. Under Configuration, select the Azure regions to allow provisioning to, ensure the checkbox is selected to create a cloud zone for each of the selected regions, and under Capability tags, enter "cloud:azure". This enable us to use tagging in the blueprint request forms to select the appropriate cloud account / endpoint to provision to. Once done, select Add.
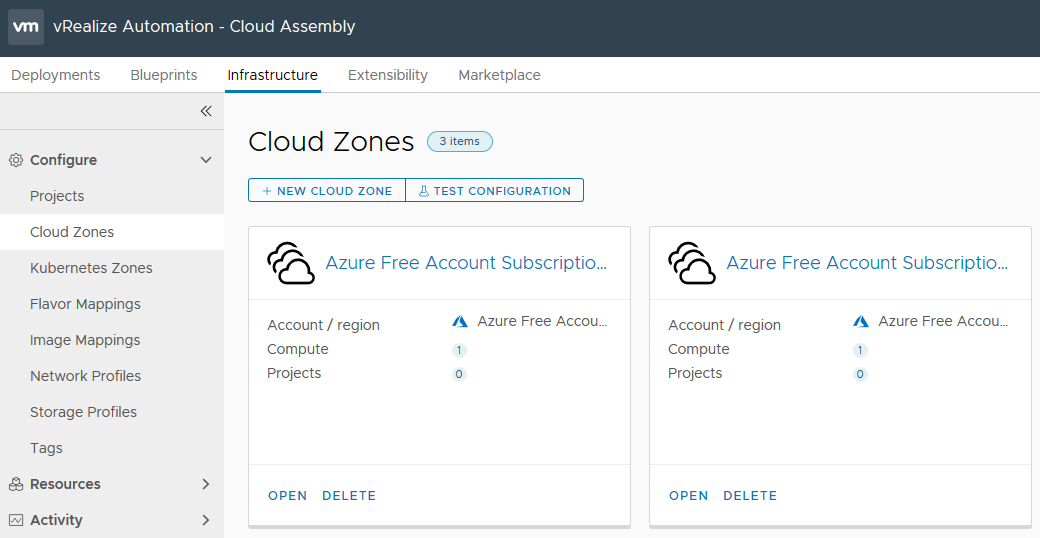
Once the Cloud Account has been created, under Configure > Cloud Zones, you will see your selected regions each having their own Cloud Zones.
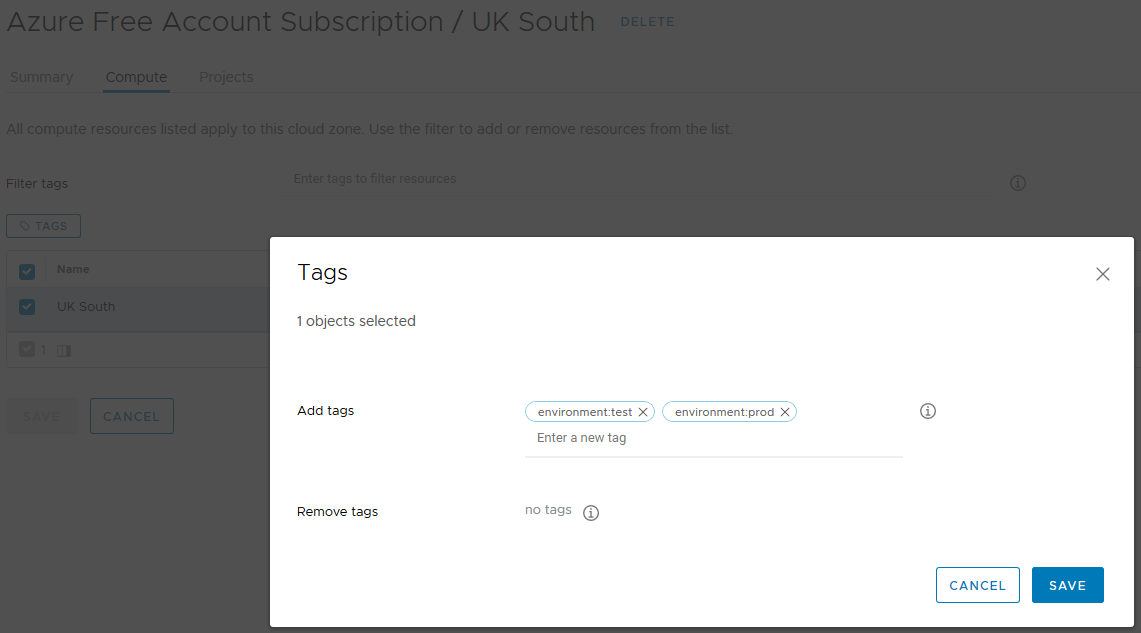
In more complex environments, you can Open the Cloud Zone and select the Compute tab, and for the region, assign capability tags. If for example you have separate regions for dev, test and prod, you could assign the capability tag “environment:dev” to UK West, and "environment:test" & "environment:prod" to UK South, to ensure that dev workloads are placed only in the UK West region, and the rest in UK South. The second part of this configuration is done in the blueprint request form.