vRealize Lifecycle Manager Part 1 - Install & Configure
One of the least discussed products from VMware, vRealize Lifecycle Manager (vRLCM), really is a fantastic product! I have been deploying vRealize Automation (vRA) since it was first purchased from DynamicOps and the first release of vCloud Automation Center was released. The vRealize suite of products have always been difficult to install and this product takes the majority of hassle out of this. This blog will cover the deployment of vRealize Lifecycle Manager.
Install vRealize Lifecycle Manager Appliance
Download the vRealize Lifecycle Manager OVA from the VMware website and save it locally. Open the vSphere Client, select the appropriate cluster and select Deploy OVF Template. Deploy the appliance with the following settings
- Content Management: Disable. Select Enable if you want the ability to build and run infrastructure content as applications
- Storage: vsanDatastore
- Network: VM-Network-DPG
- Hostname: vrlcm.homelab.local
- Join CEIP: Yes or No
- Certificate Common Name: *.homelab.local
- Certificate Organisation Name: Homelab
- Certificate Organisation Unit: Homelab
- Certificate Country Code: GB
- Default Gateway: 192.168.0.1
- Domain Name: homelab.local
- Domain Search Path: homelab.local
- Domain Name Servers: 192.168.0.120
- IP Address: 192.168.0.111
- Netmask: 255.255.255.0
Configure vRealize Lifecycle Manager
Power the appliance on and then navigate to the UI https://
Scroll down the page a little and you will see the list of applications which can be deployed by vRLCM and the different versions. Select the versions you will deploy in your environment and download them.

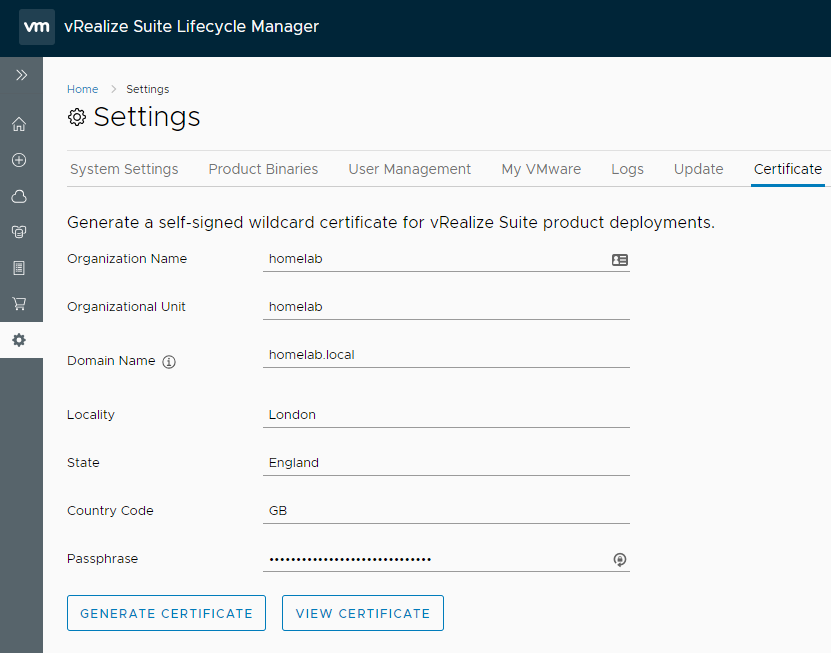
This will initiate the download requests which you can track in the Requests tab on the left hand menu. Once this has completed, select Settings, Certificate and enter the information to create a generic self signed certificate which will be deployed to each of the applications deployed by vRLCM.
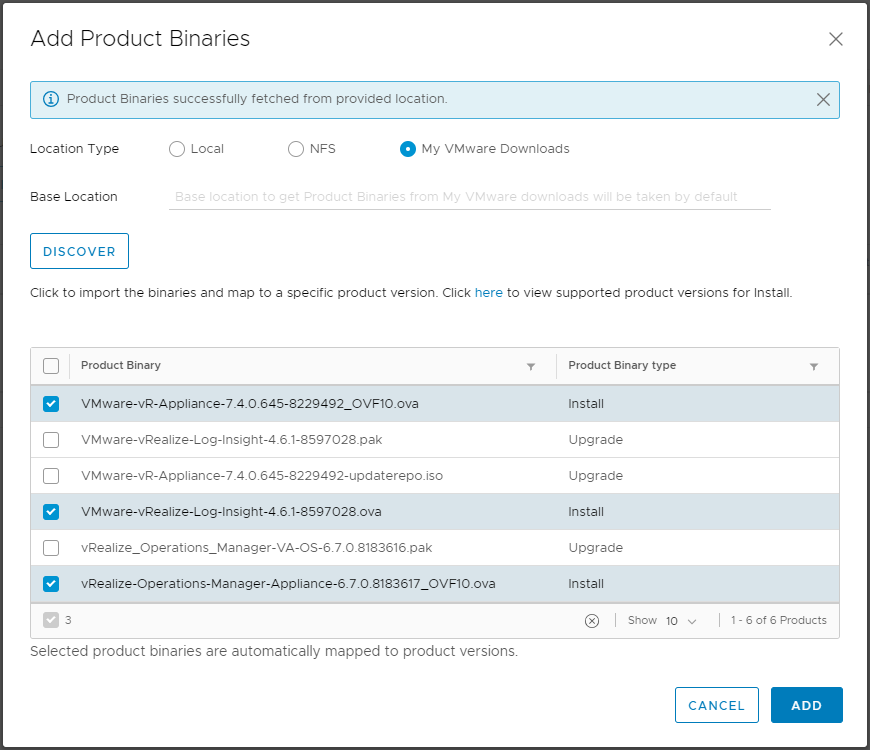
Once all of the applications have been downloaded, select Settings, Product Binaries, Add Product Binaries. Select My VMware Downloads and Discover. This will then map those downloads to the correct products and you can select to import the Install and/or Upgrade binaries.
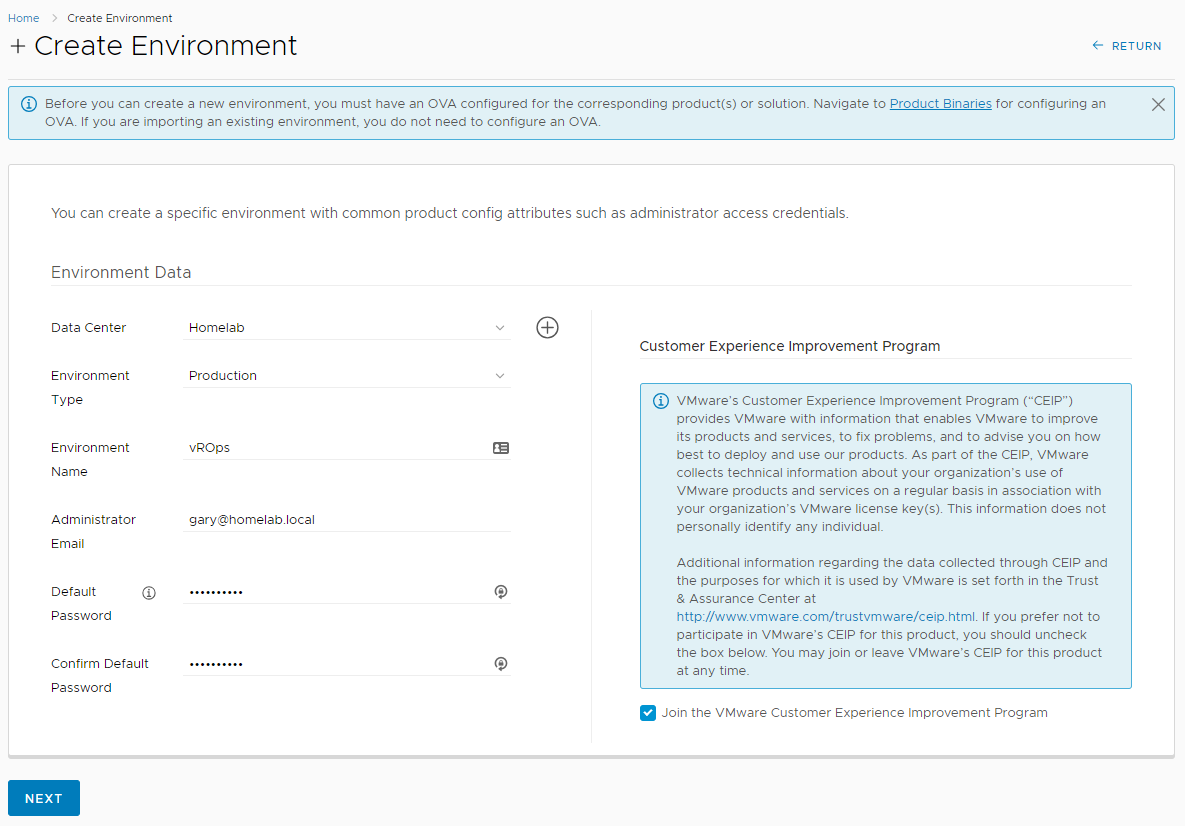
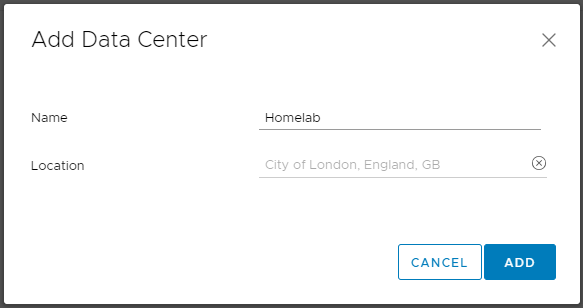
With the products added, from the left hand menu, select Data Centers, Add Data Center. Enter a name for your Data Center and select an appropriate location.
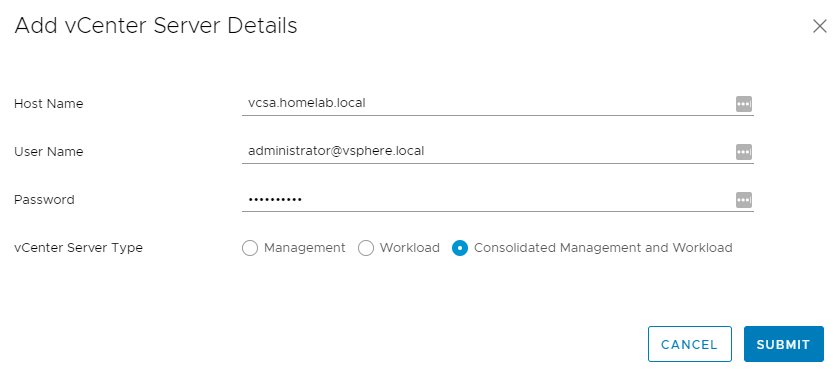
Once the data center has been added, select Manage vCenter Servers and add your existing vCenter Server details. A data collection will be requested which you can verify has been successful from the Requests page.
Once the data collection has completed, you have successfully installed and configured vRealize Lifecycle Manager. Part two of this blog will cover deploying your first application.