vRealize Lifecycle Manager Part 2 - Deploying an Application
Part one of this blog covered the installation and configuration of vRSLCM which can be found here and this post will cover deploying your first application.
Create an Environment
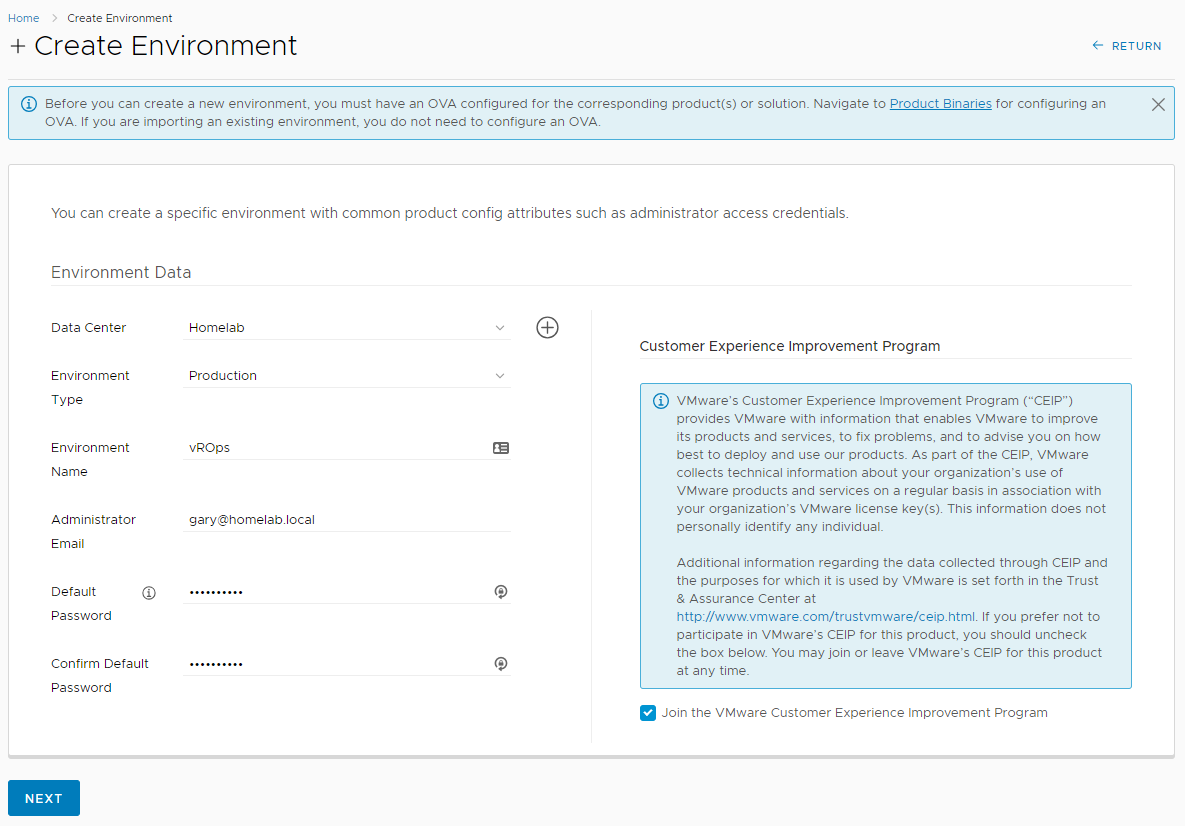
In vRSLCM, the concept of environments can mean two different things. It could mean Dev/Test/Prod where multiple applications are deployed in one environment or it could mean Dev vRA/Dev vROps/Test vRA/Test vROps where each environment and application combination has its own environment. In my homelab, I have gone with the latter understanding as there are some limitations placing all of the products in a single environment instance. In the Create Environment wizard, enter the information for which you wish to deploy. Select Next when this is complete.
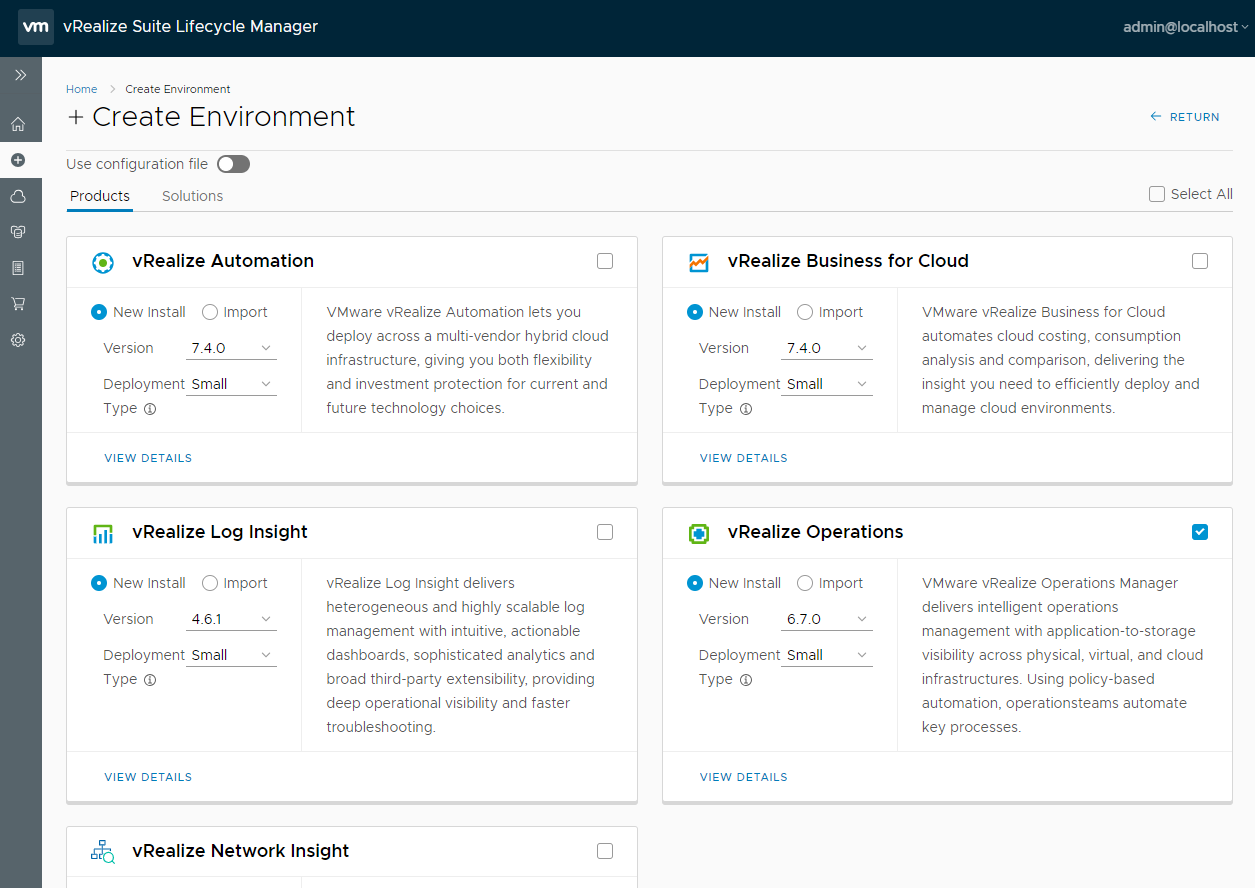
On the next tab, the different products available are presented. I will be deploying a Small vROps 6.7 instance from scratch so I have select it as a New Install. Note the checkbox in the top right corner of each product which says which product to deploy. If deploying vRSLCM into a production environment, you have the option here to import your existing environment into vRSLCM. Scroll down and select Next.
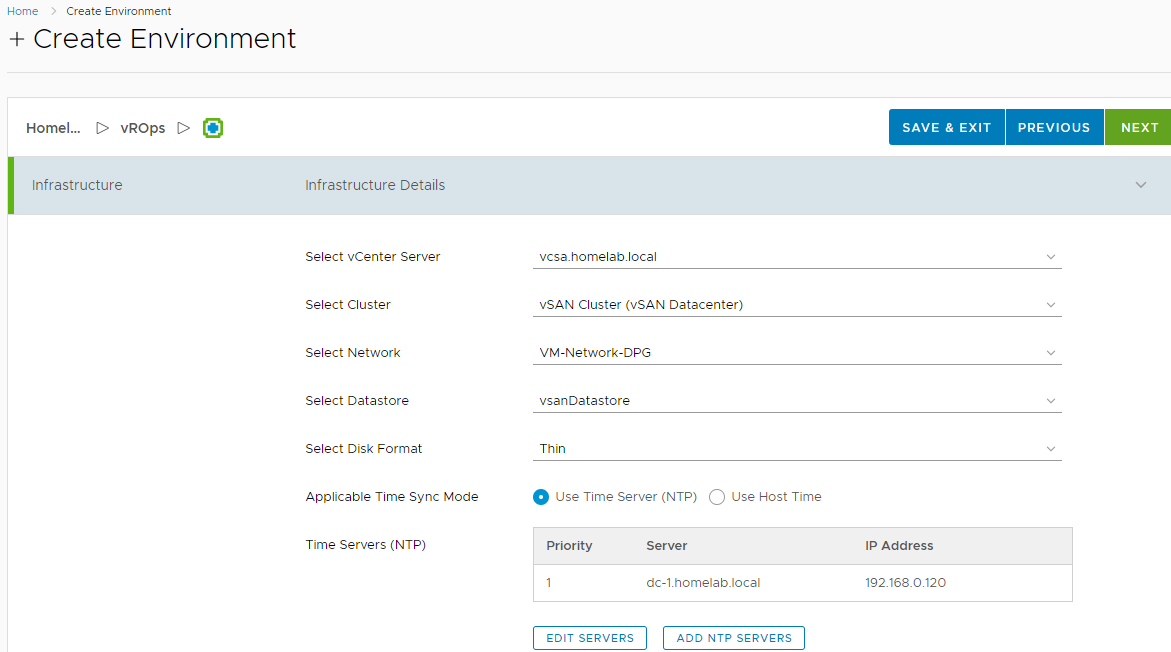
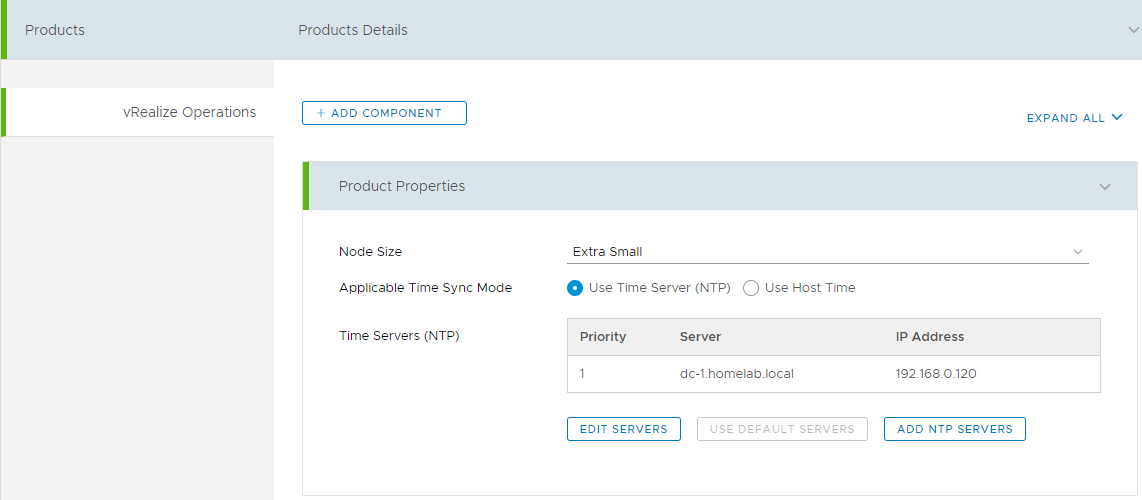
On the next page the appliance configuration is supplied. Accept the EULA (if you do) and enter your product key for the product. Select the Infrastructure where you would like the application deployed. note the network must not be an Ephemeral Binding Port Group.
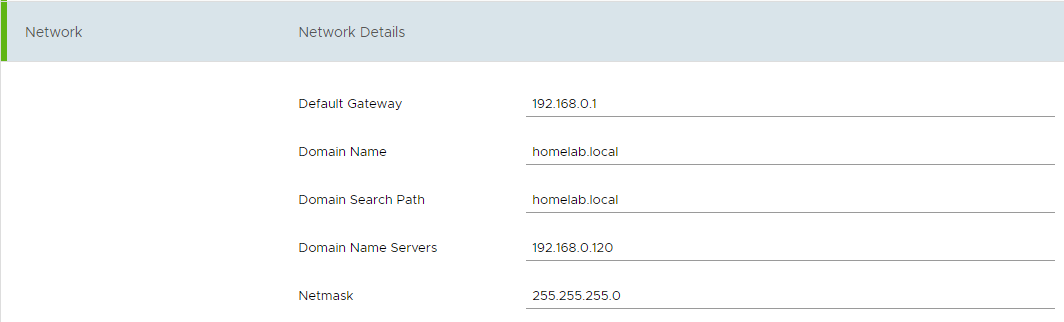
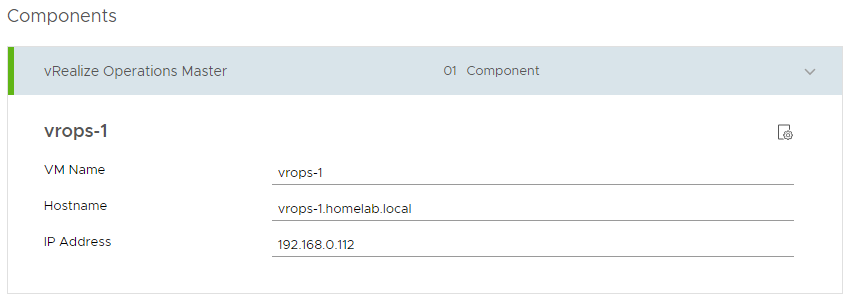
Enter the network details for the appliance
Select Use Generated Certificate if you generated a certificate in part one of this guide. The next section will cover the configuration of the application you are deploying.
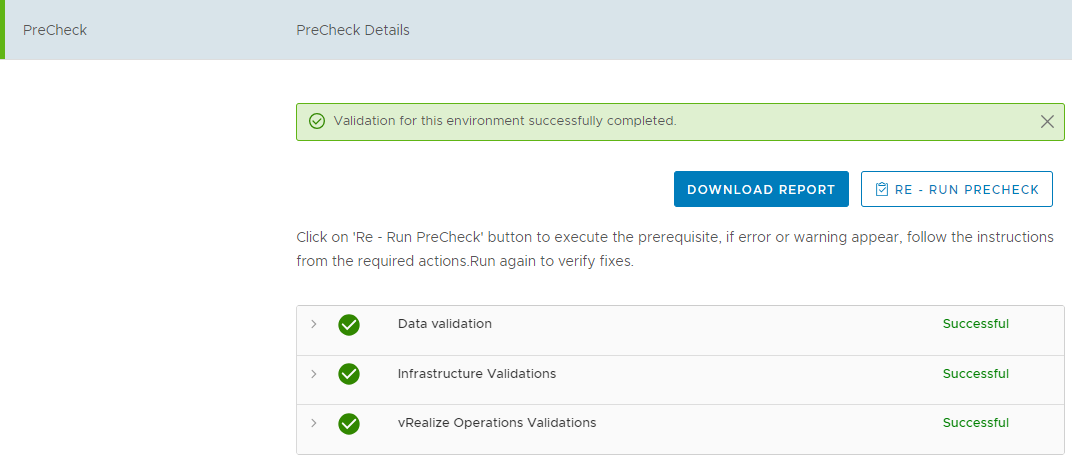
Once all of the configuration is provided, vRSLCM will perform a Pre Check Validation of the parameters provided to ensure the deployment will succeed. In my environment, I was deploying to an Ephemeral Port Group which is not supported in vRSLCM so I moved to a Static Port Group and the Pre Check Validation succeed.
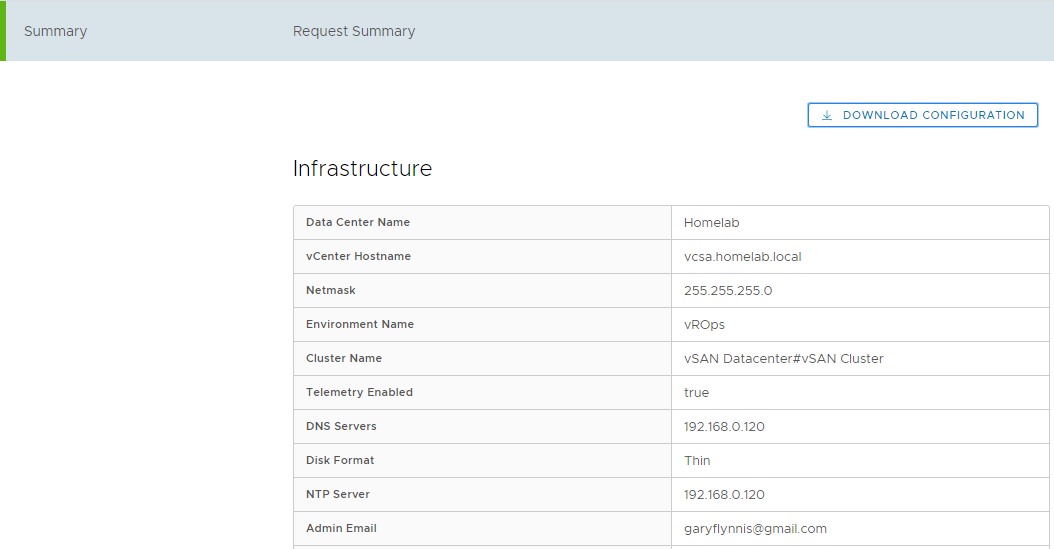
Once the validation has completed, in the next section you are able to download your configuration as code so that you can easily deploy this environment again. Once you have downloaded the configuration (even just as a backup), select Submit.
Once the request has been submitted, you can check the status on the Requests page in the left hand menu which will show you the pipeline which is used to deploy and configure the application. Once it has succeeded, you will be able to log in to the application using the default password you provided in the installation wizard.