vRealize Automation 8.x - Getting Started (Quickstart)
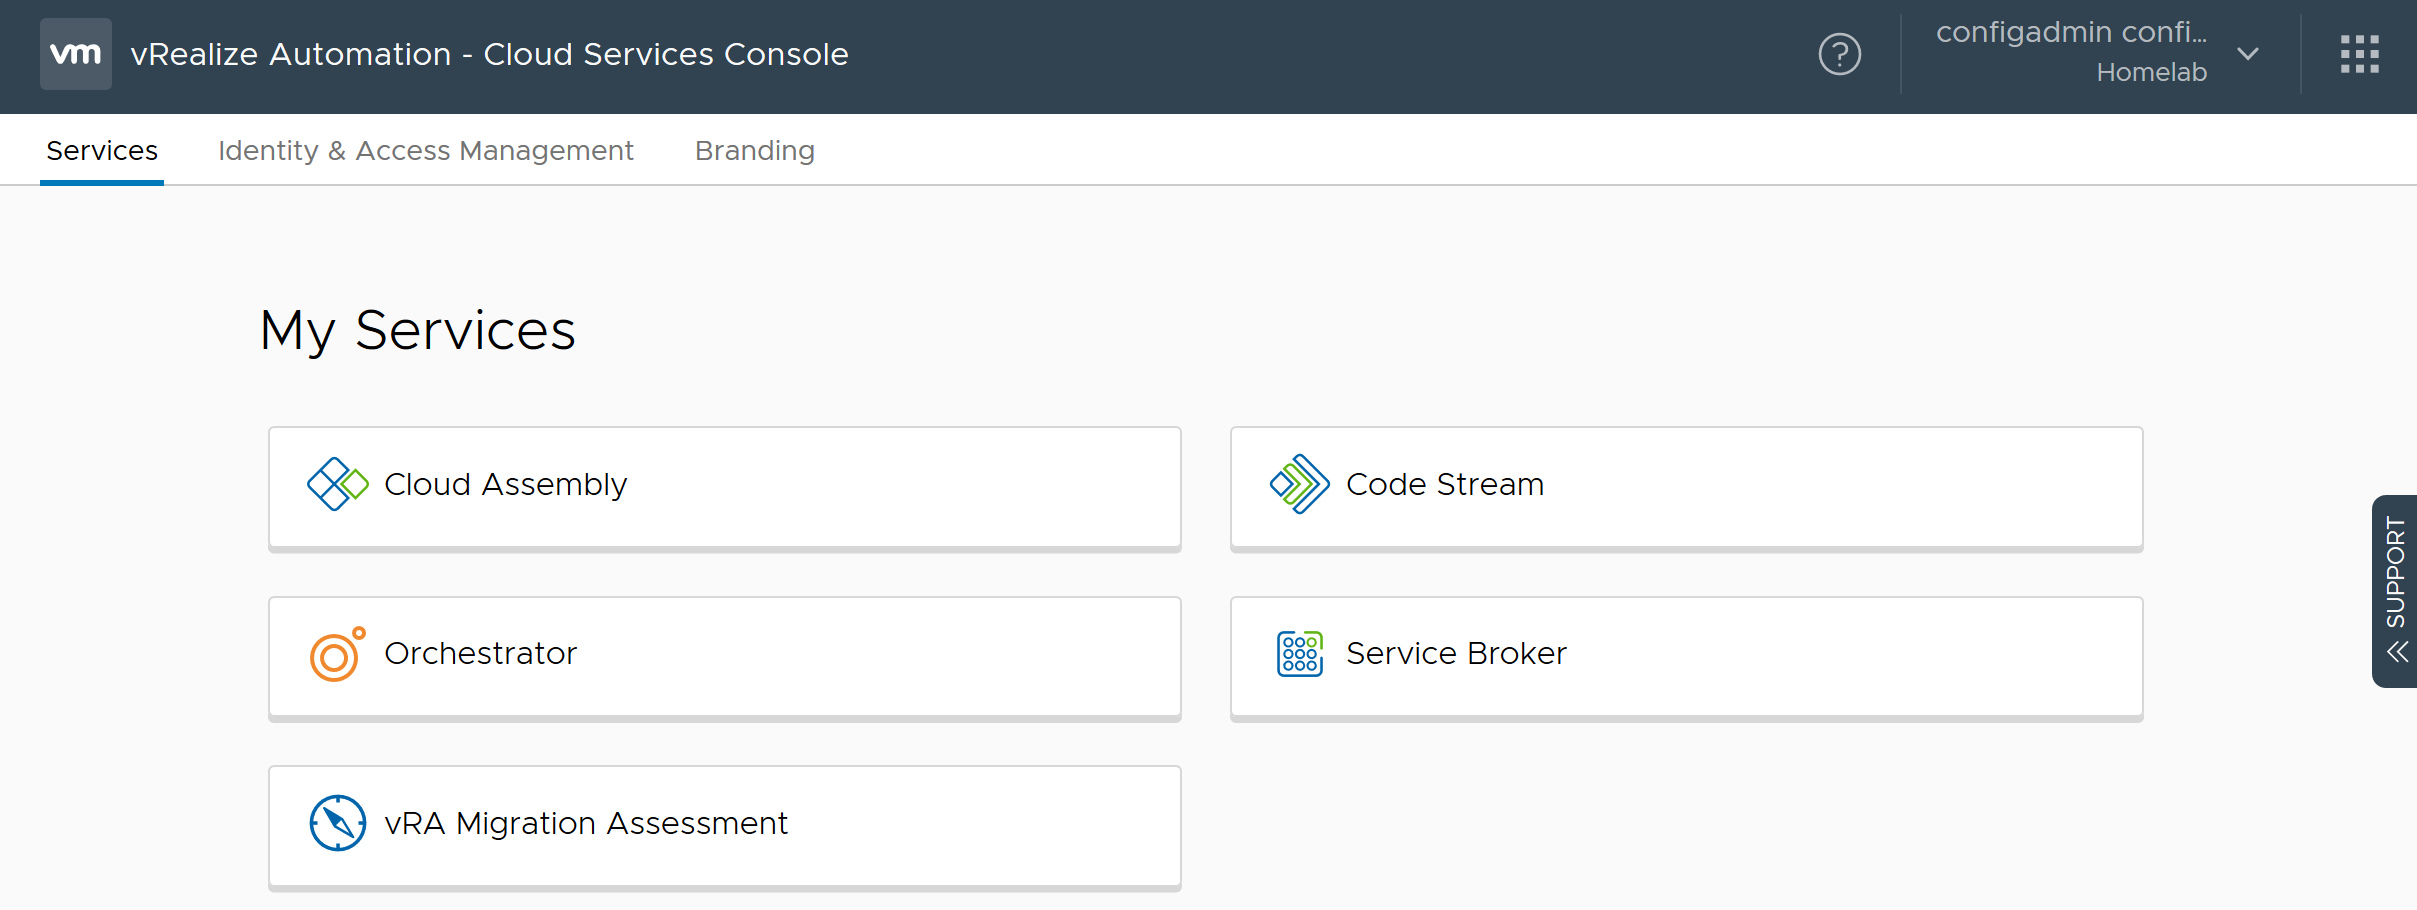
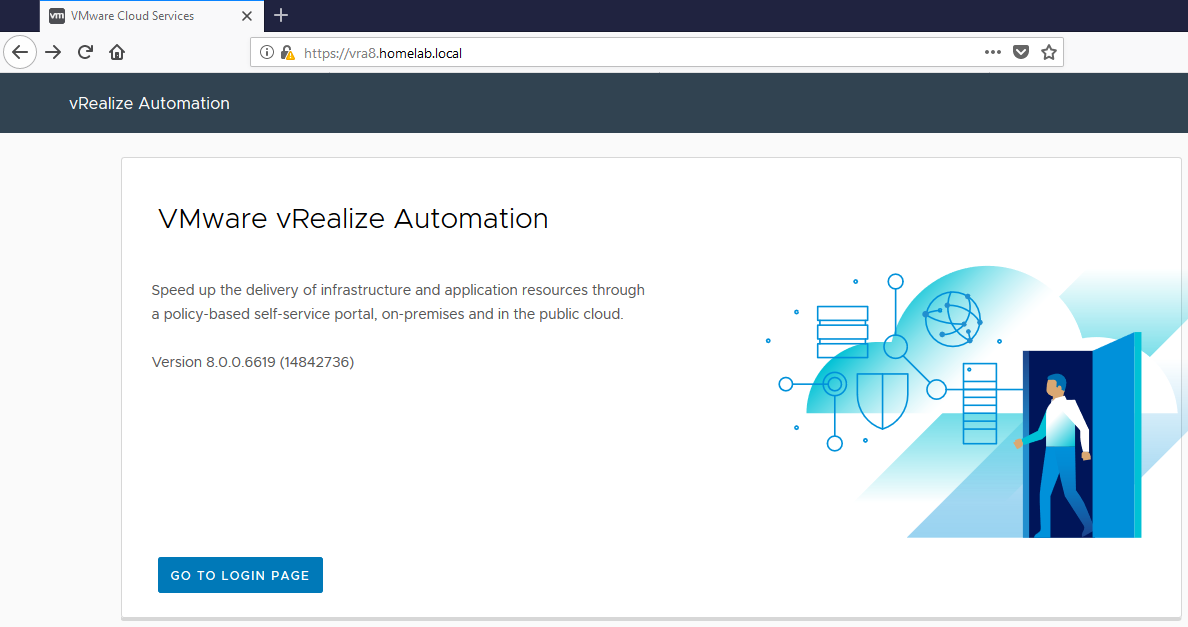
In the previous post we deployed all of the vRealize Suite products and we are now ready to log into vRA and configure it for use. vRA 8.0 is a fundamental change from 7.x and it now consists of four main components, Cloud Assembly, Service Broker, Code Stream and Orchestrator. Let's get vRA 8.0 configured! Load up the vRA homepage https://<vRA FDQN>/ where you are greeted with the welcome page. One thing to note is that the new vRA 8.0 appliance does not contain a VAMI, instead non-UI configuration is done using the "vracli" commands on the appliance shell.
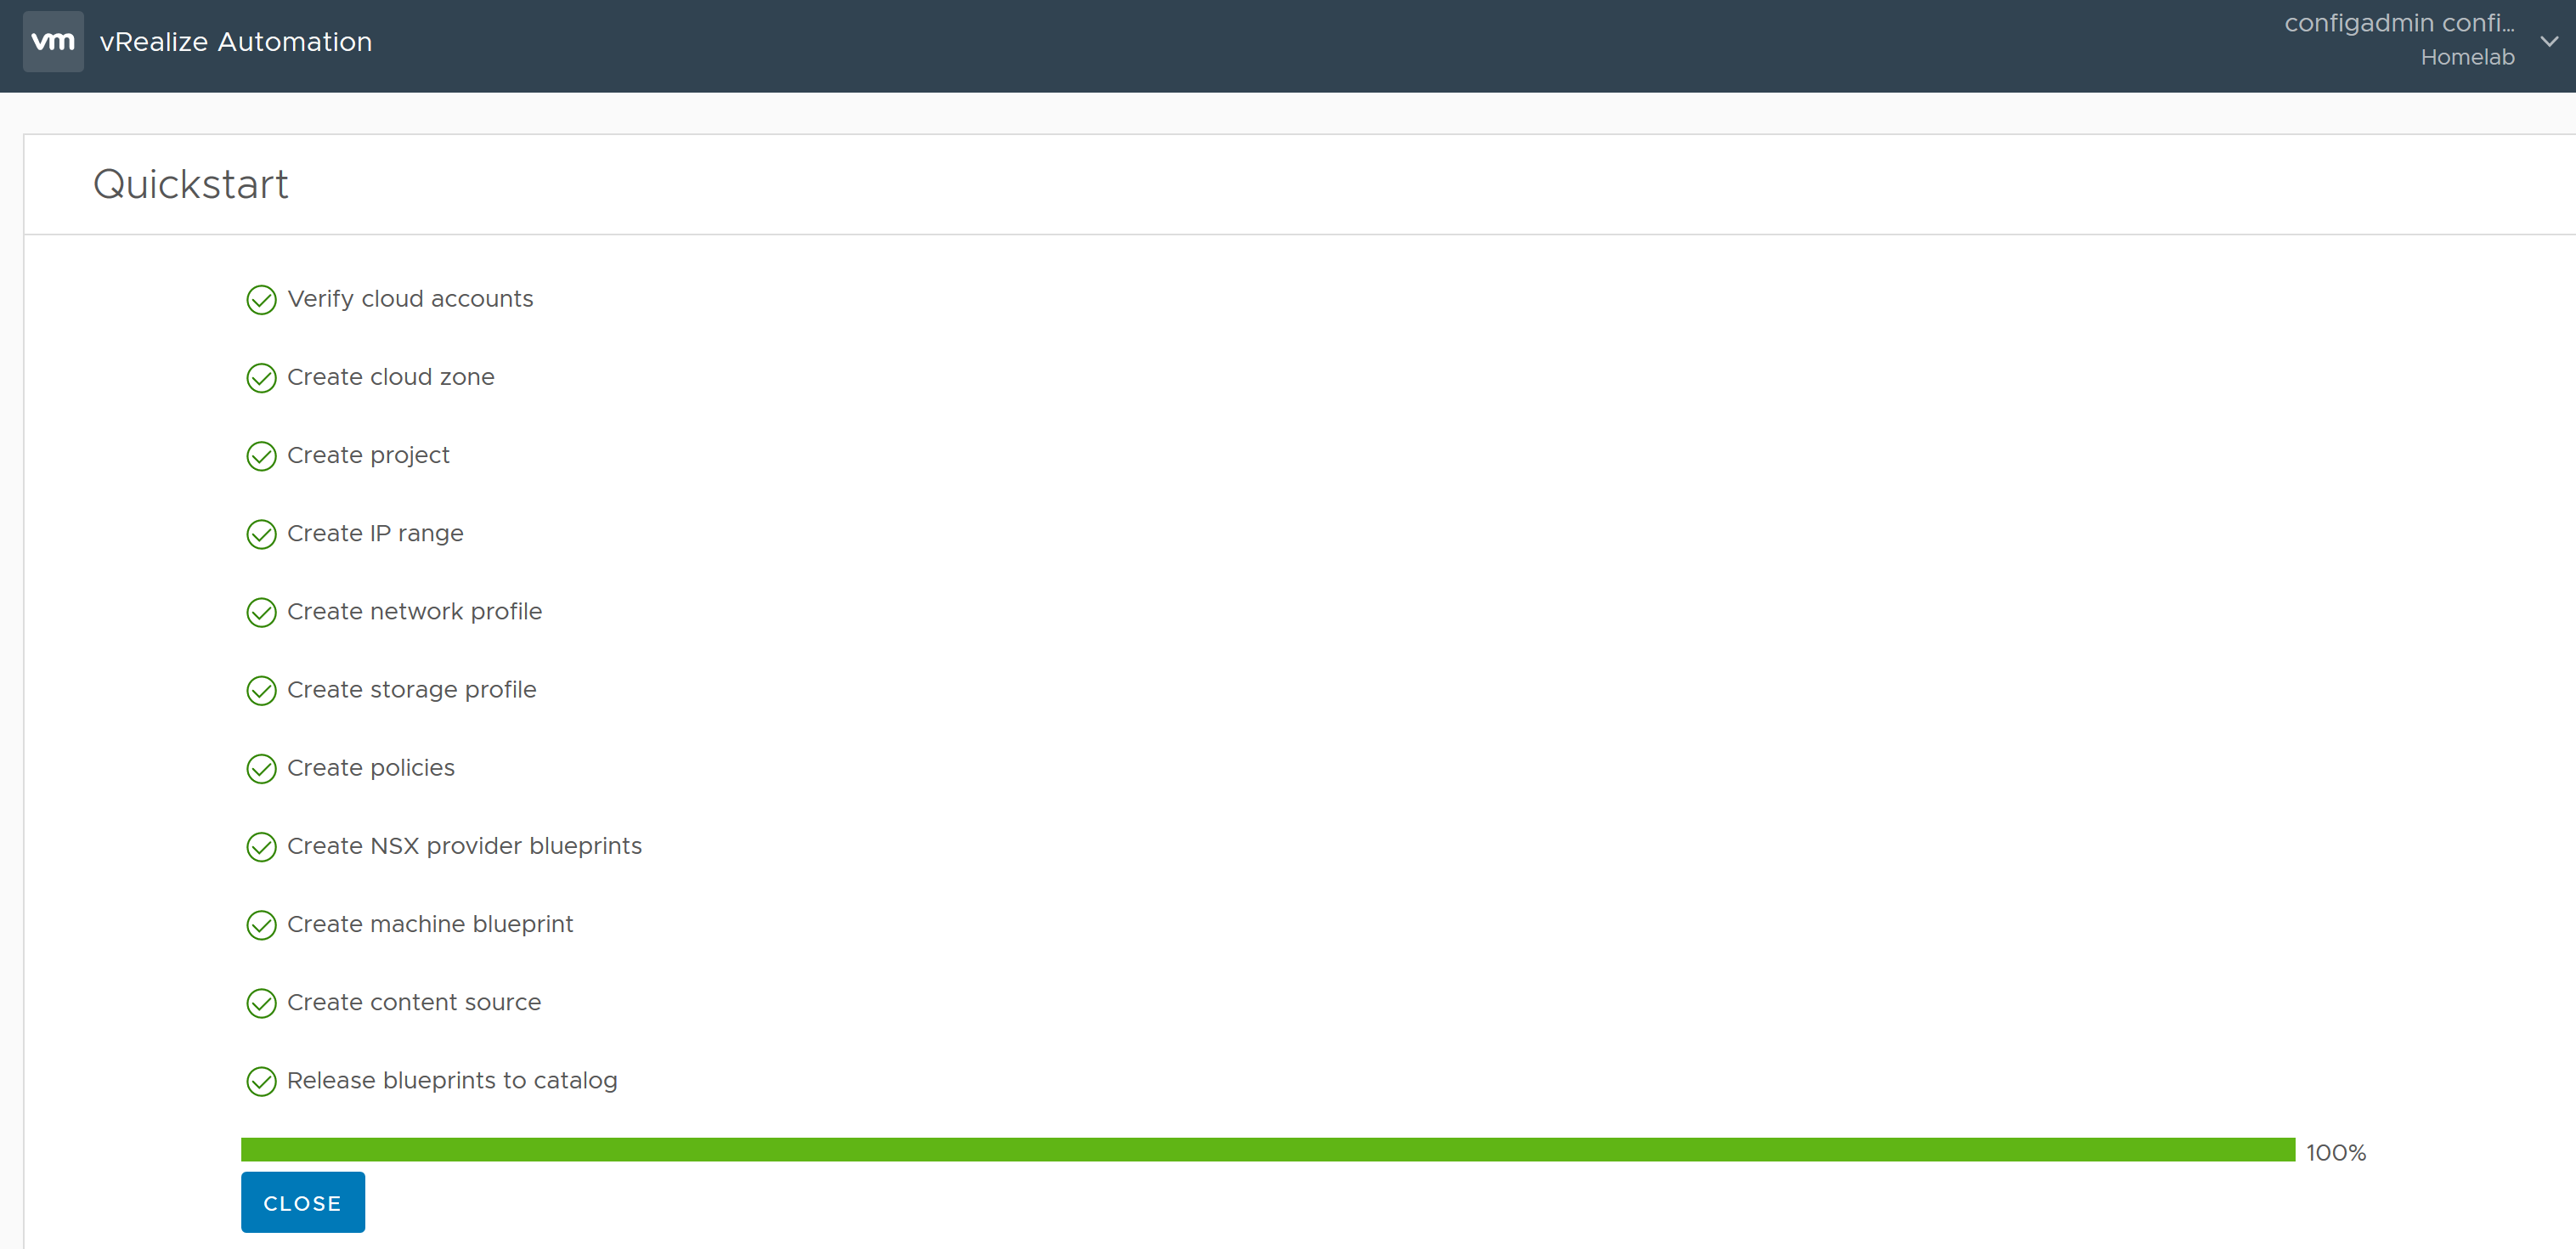
Log in using the vIDM configuration user created earlier "configadmin" where you are greeted with the vRA Portal. Select the "Launch Quickstart" button to create a sample blueprint, assign it to a service and publish it to the catalog based off a vSphere Template which you select.
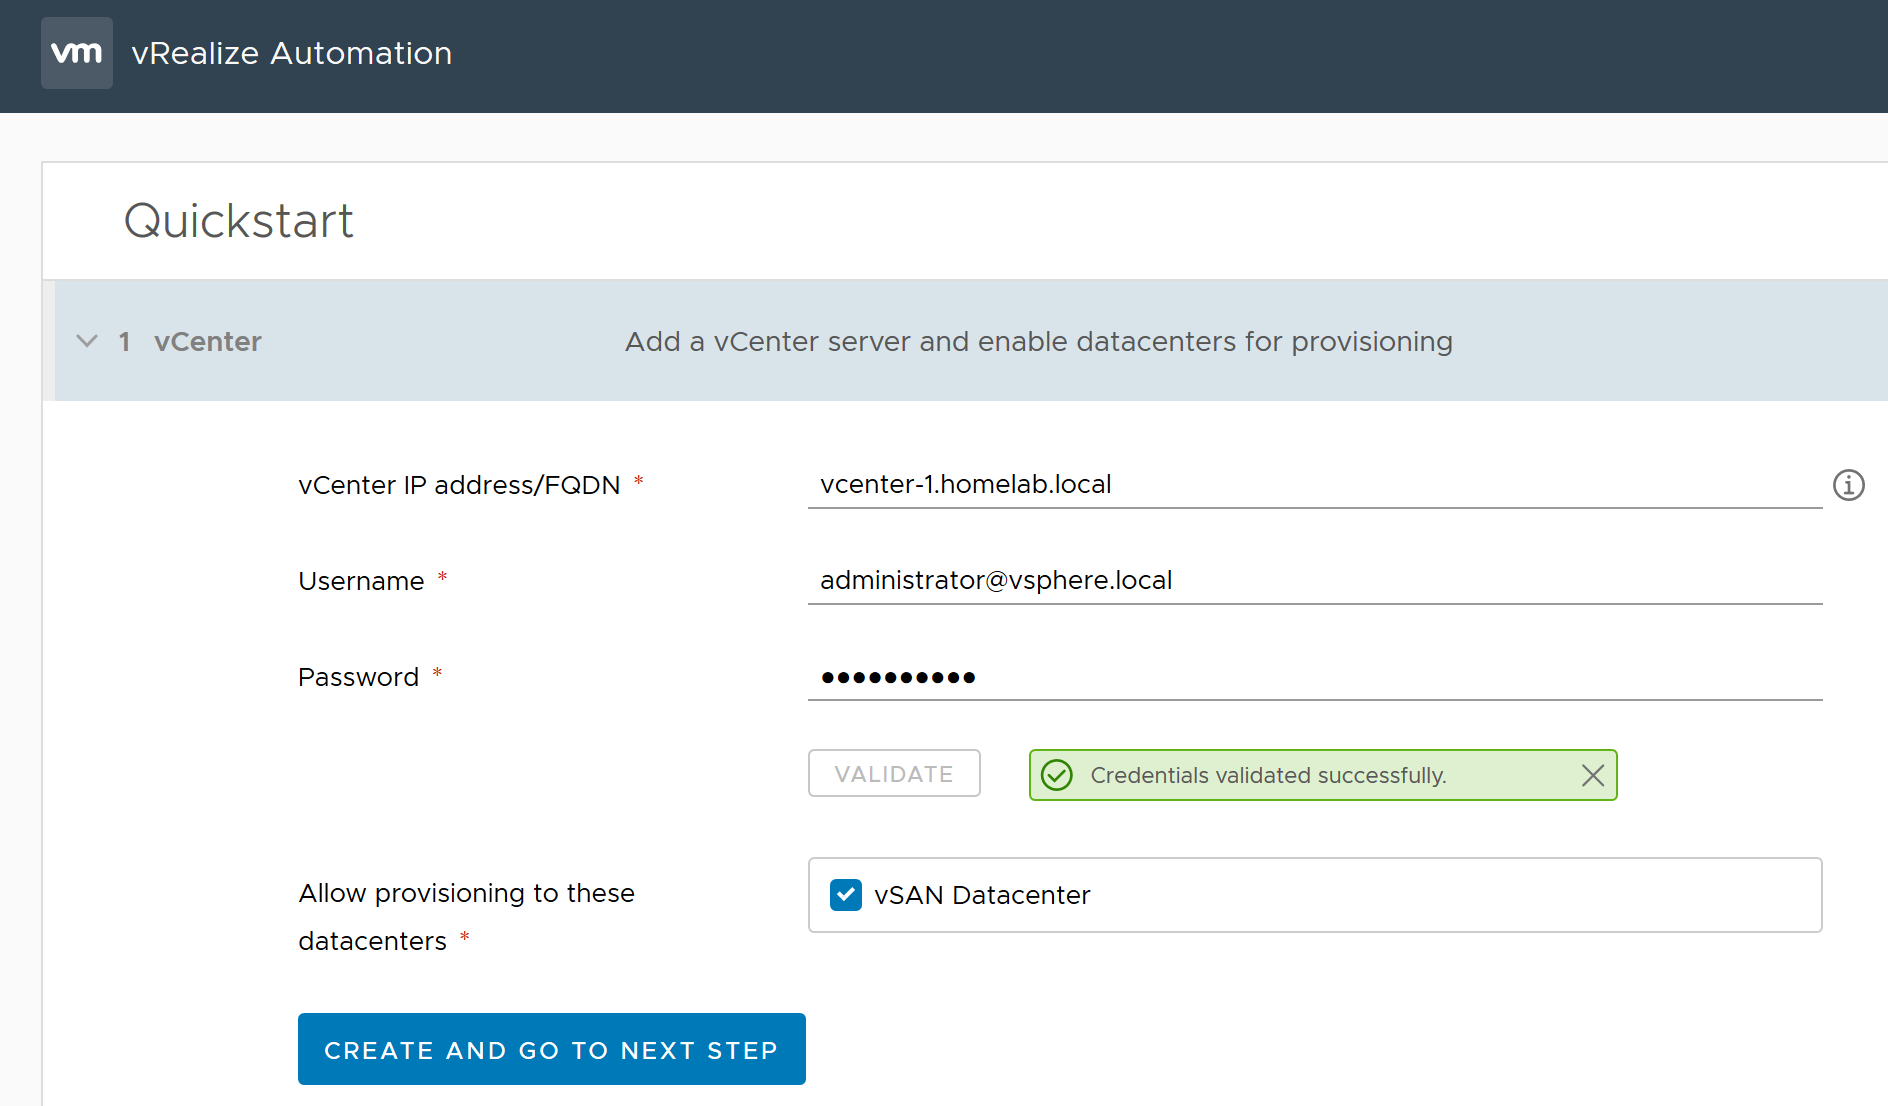
Enter your vCenter FQDN / IP address along with the username and password with appropriate permissions. Validate the credentials, select the Datacenter where provisioning is allowed, and select "Create and go to next step".
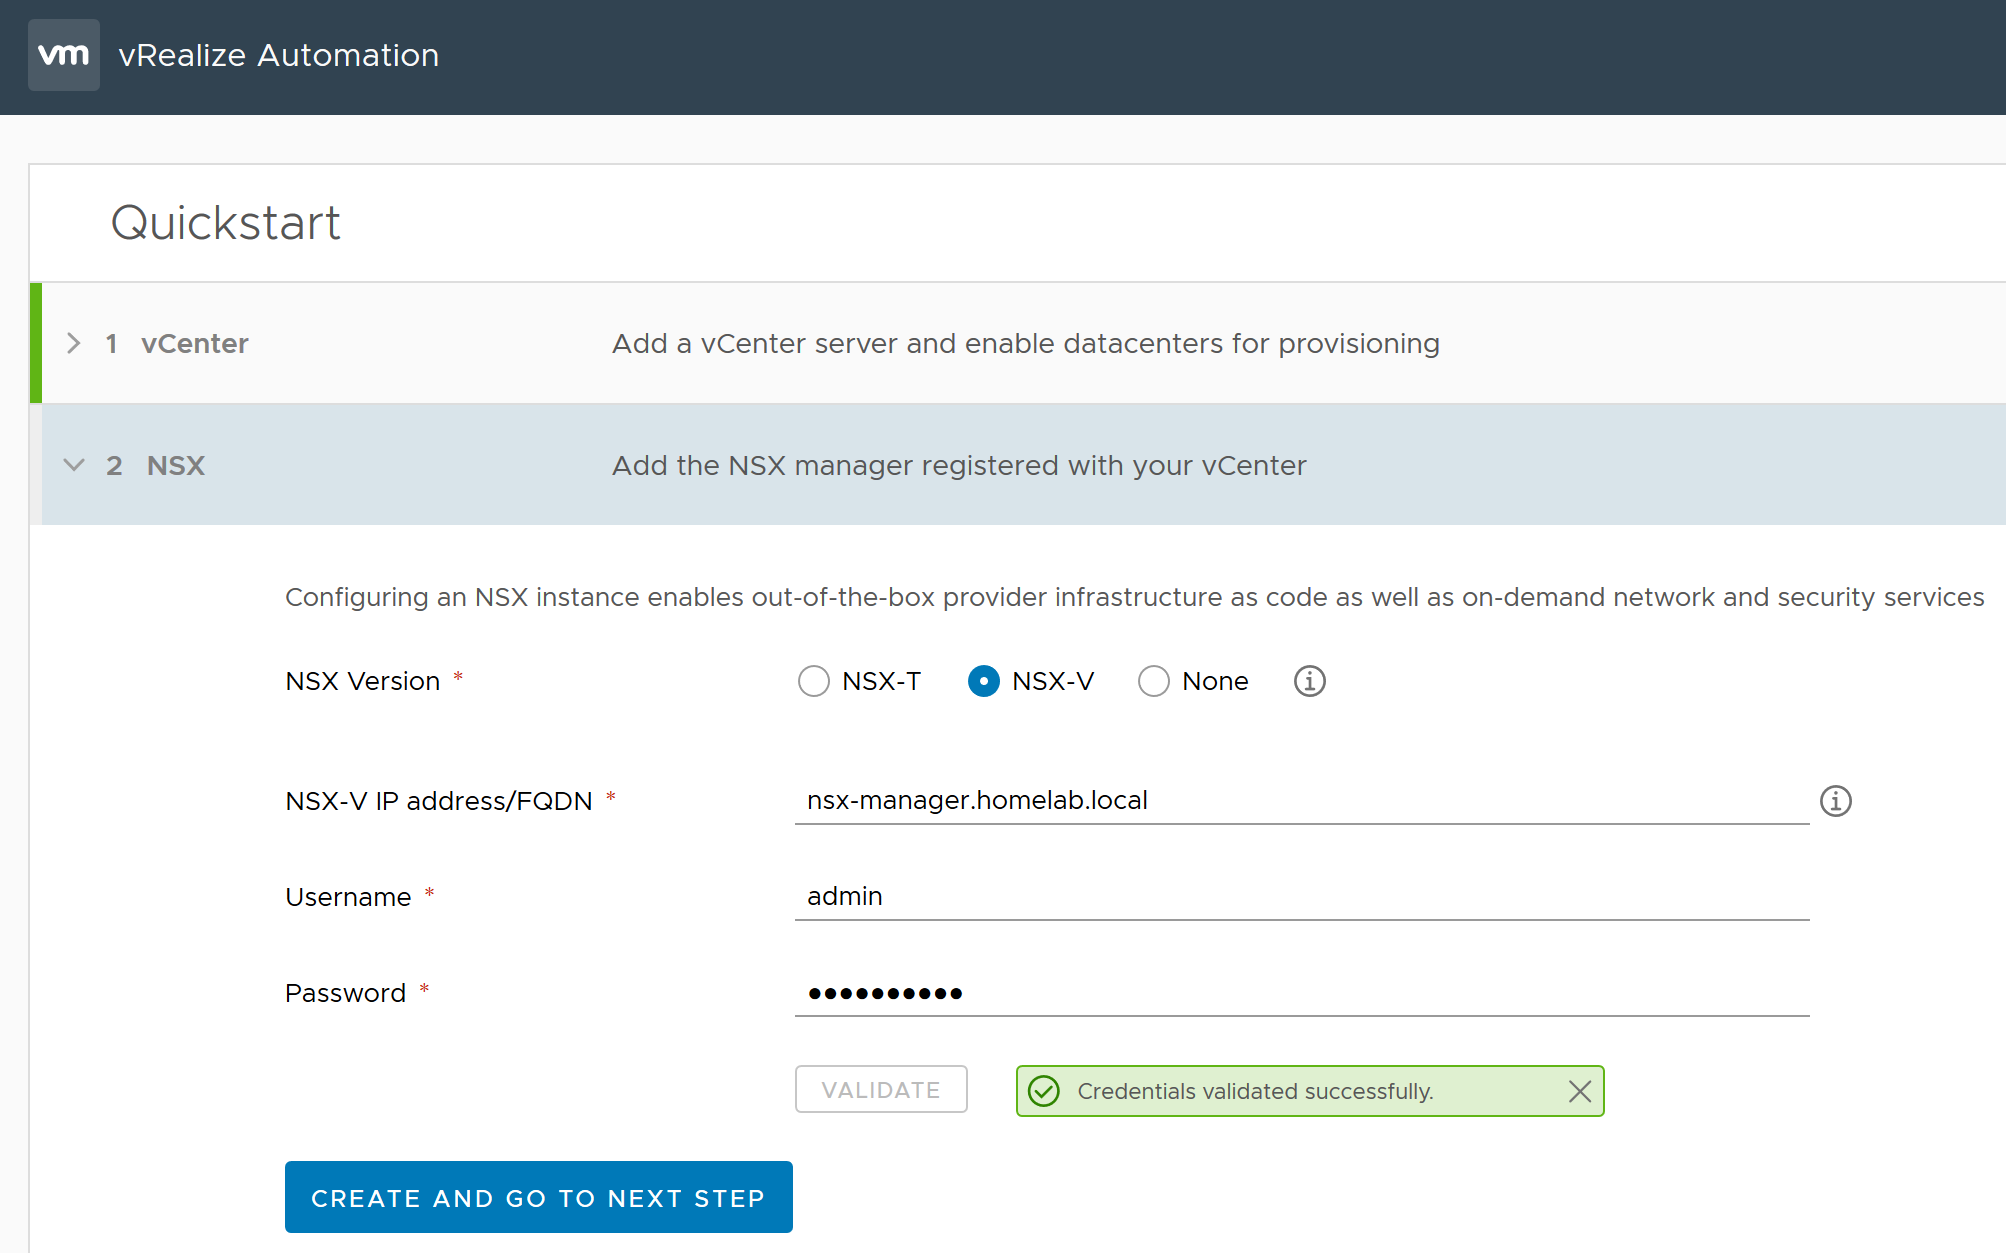
Optionally configure your NSX-V / NSX-T environment with FDQN / IP address, username and password, validate the credentials and select "Create and go to next step".
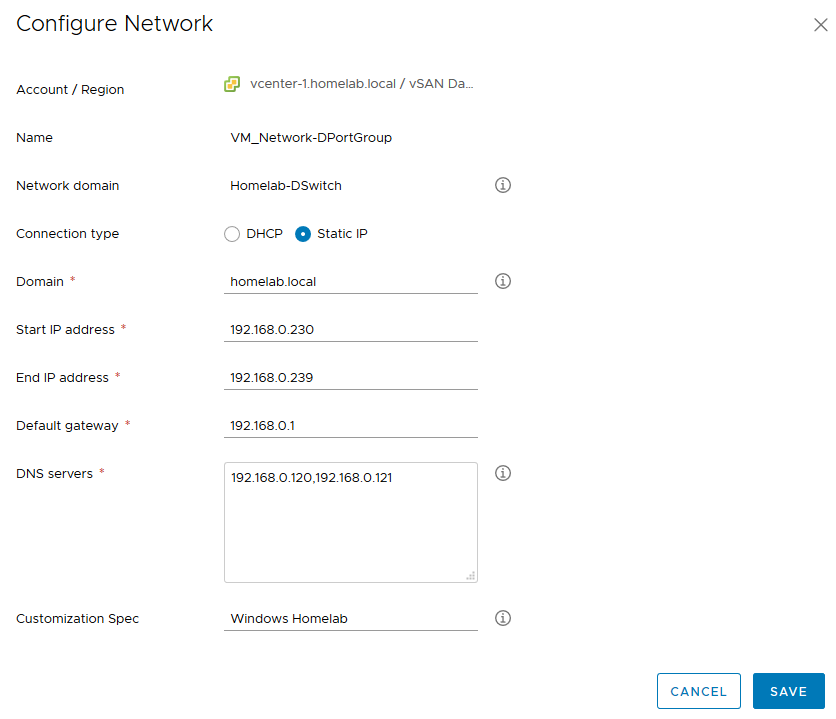
The Basic Configuration section is where you select a vCenter template, and the quickstart wizard will create your first blueprint, release it to a catalog and then deploy it for the first time. Select the vCenter template, datastore and network before choosing between DHCP and Static IP. If choosing Static IP, provide details of the network IP range, default gateway, DNS servers and optionally a Customization Spec to use. Select Save and Next Step.

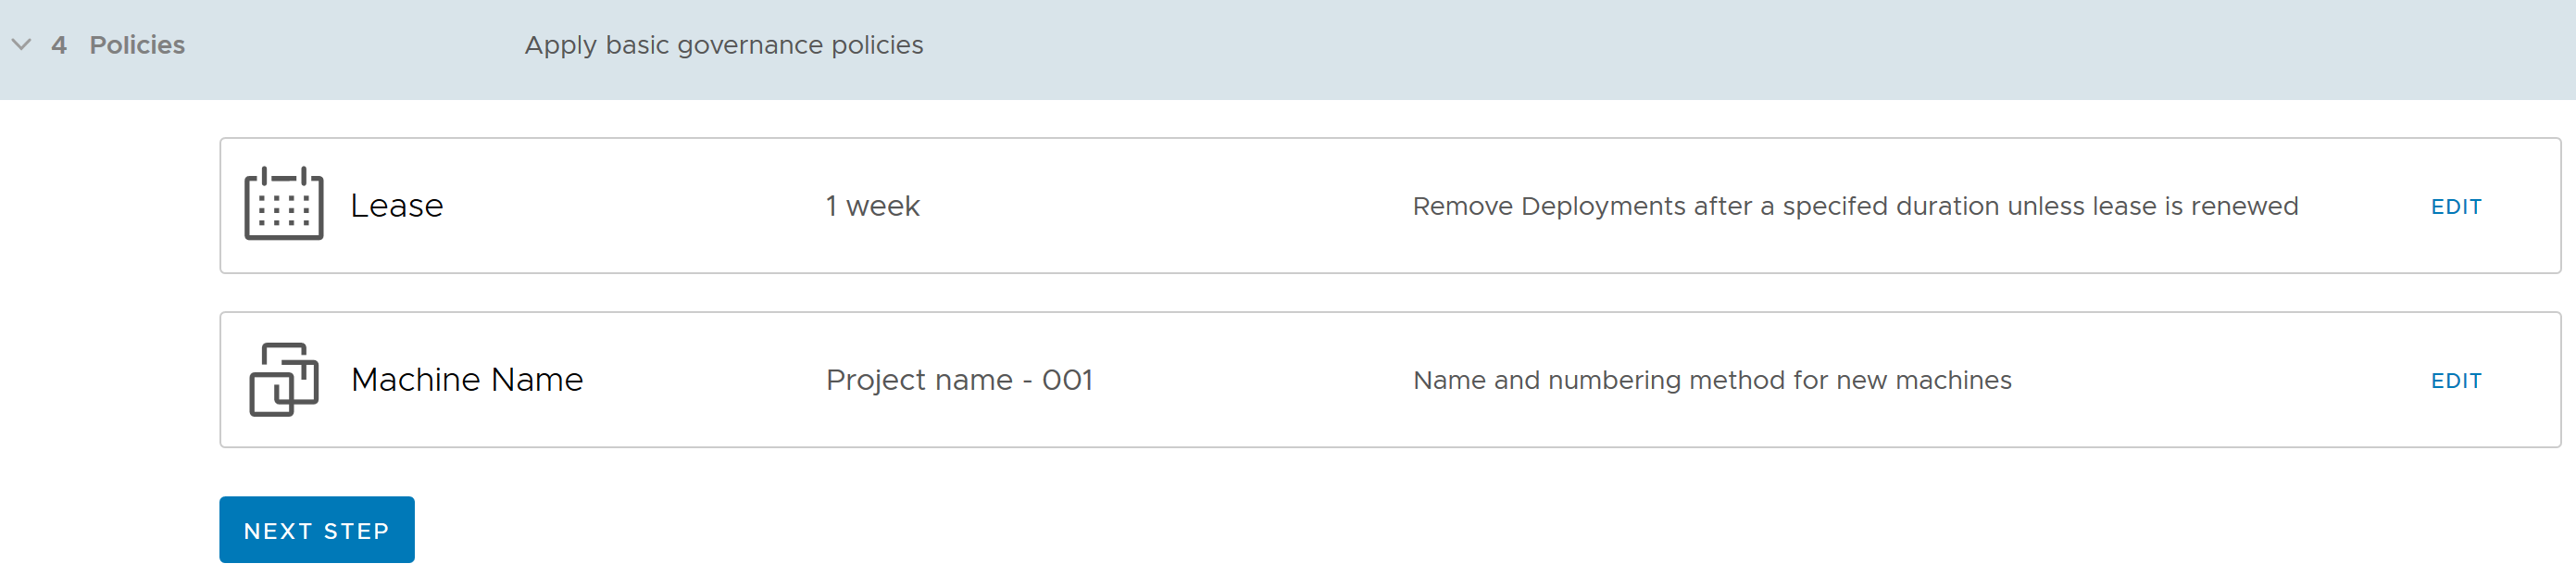
Governance Policies are critical for any environment and this is where you select the Default Lease duration along with the machine naming standard. By default, the lease will be 1 week and we will keep this as is. Select Edit next to the Machine Name and change the Machine Name Prefix from Requestor Name - 001 to Project Name - 001, then select Next Step.
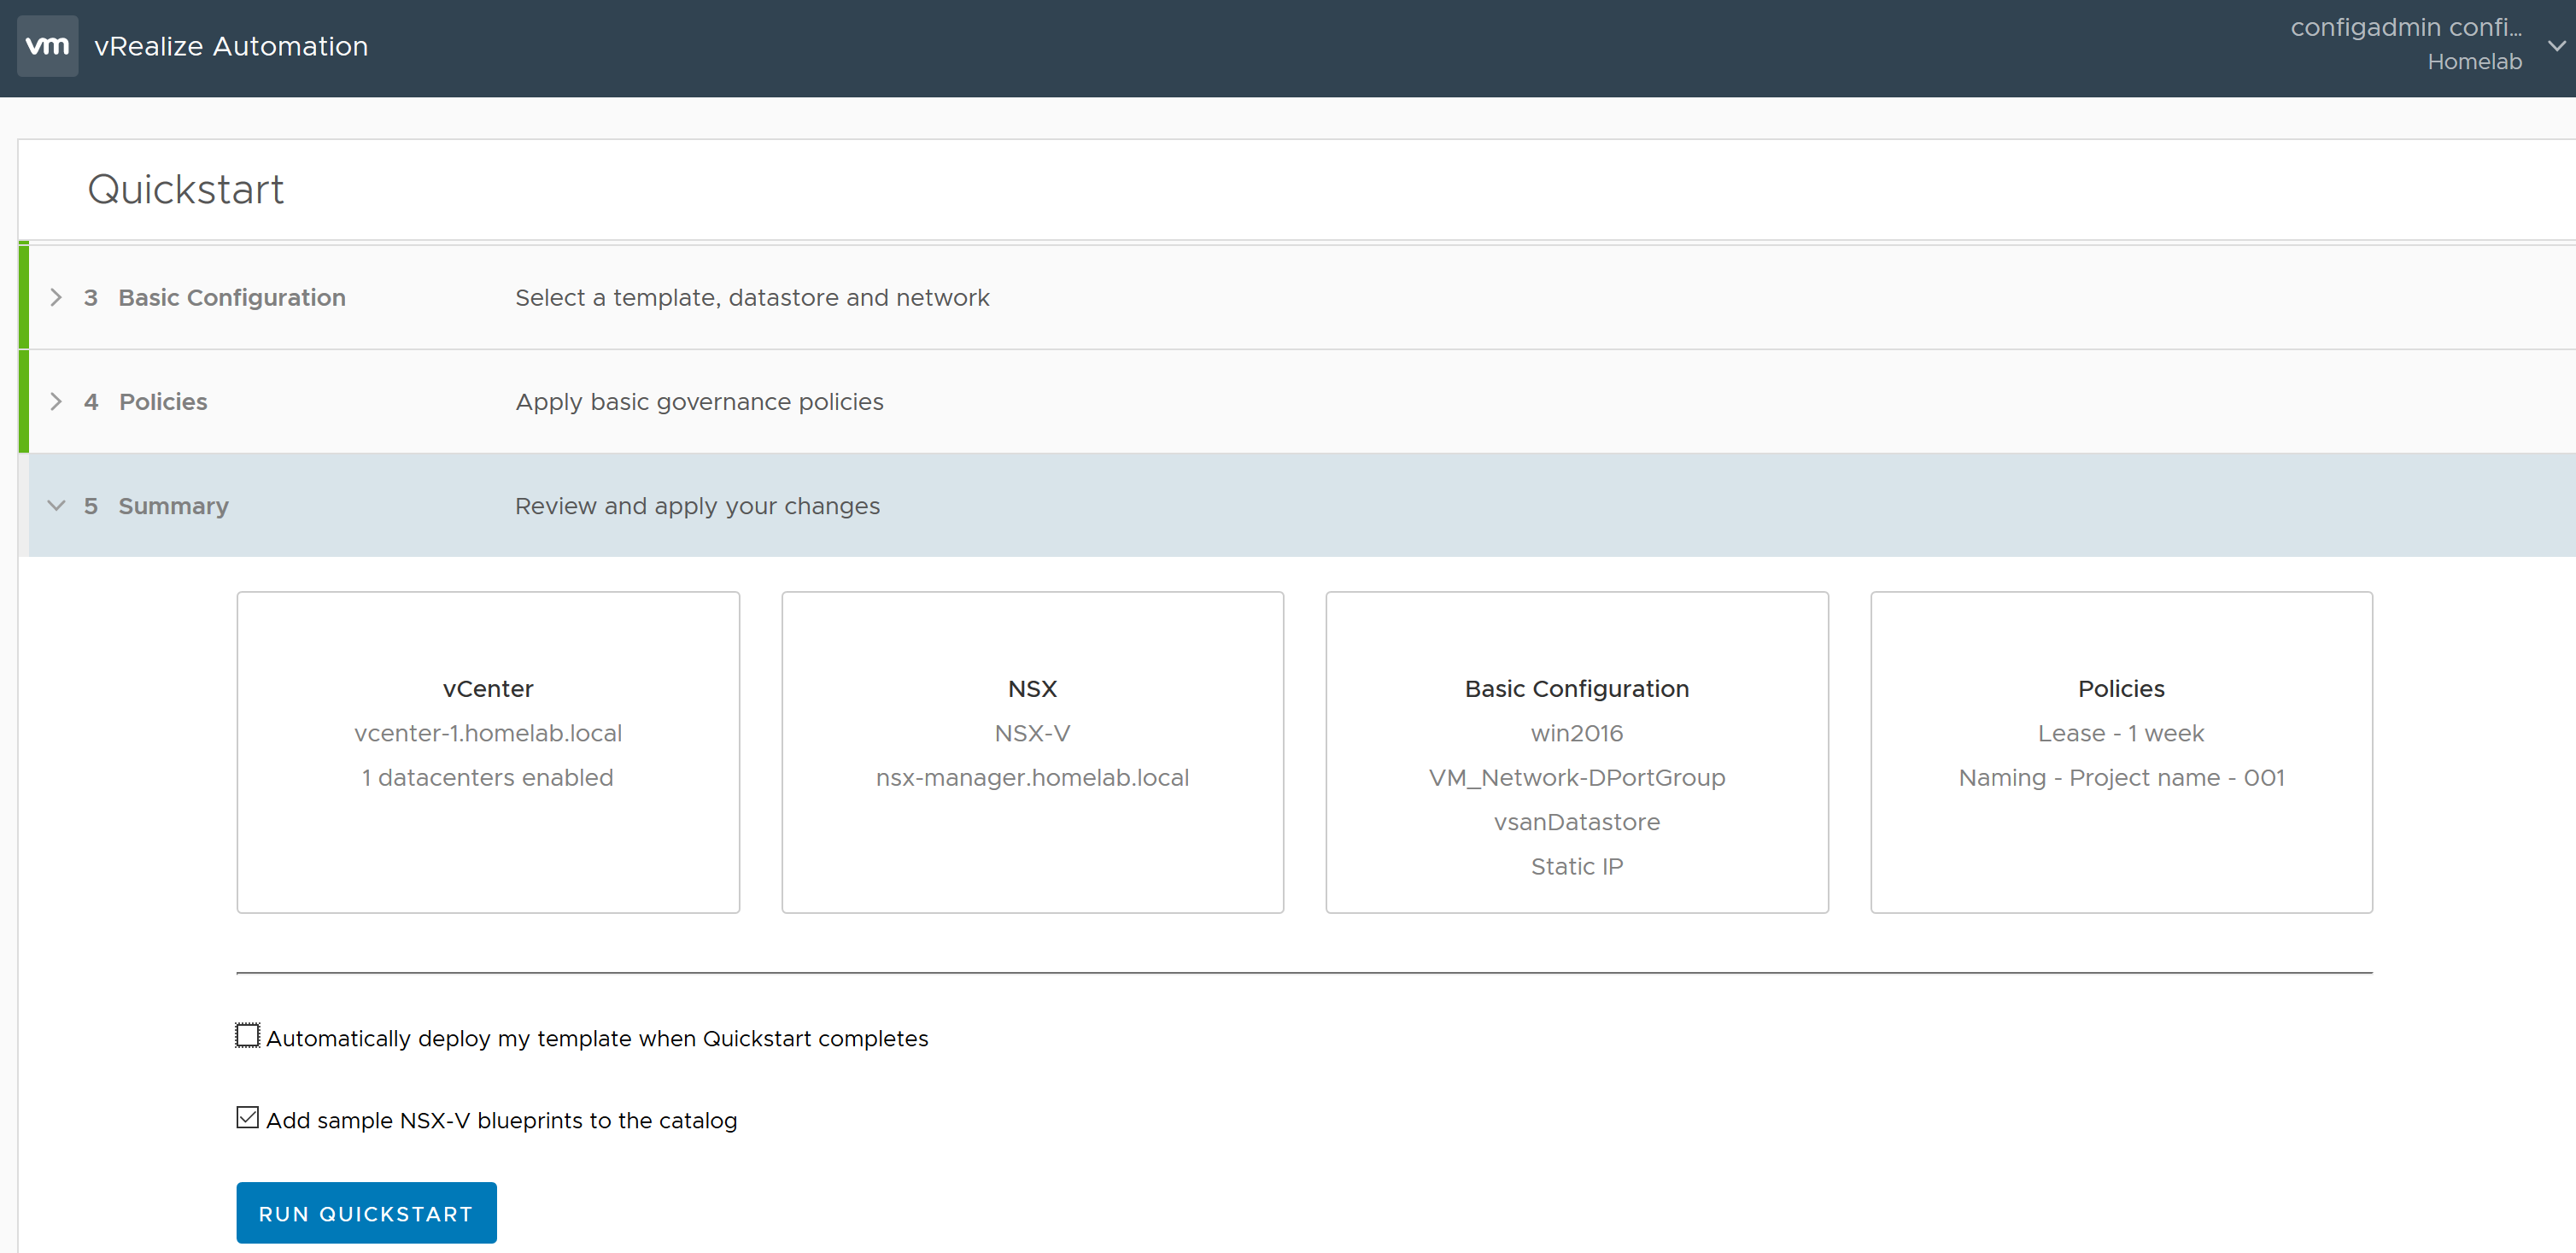
Confirm the Summary page looks correct and optionally disable the "Automatically deploy my template when Quickstart completes" option along with optionally disabling the "Add sample NSX-V blueprints to the catalog". Now run the Quickstart!
Once the wizard is complete, verify everything is successful before closing the wizard and moving on. Congratulations, you have the basic vRA 8.0 constructs in place now for your existing vSphere template. The page will redirect you back to the vRA Services page. Check out the next post to learn about the different Services.